
When someone hears the word “Architecture,” the thought that comes to their mind is the images of beautiful buildings, modern houses and a good-looking office. But behind every well-planned house, building or office, there is a structure that starts with an idea, a sketch and a design.
At CAD Training Institute, our Architecture Course in Delhi is designed to guide students through the complete process, from the first sketch to a complete 3d walkthrough of their project.
In this blog, we will brief the complete course flow in which students learn to make drafts then convert them into 3D structures. This way, you will understand what exactly you need to learn to become an architecture interior designer.
Architecture Courses Learning Process: From First Draft to 3D Walkthrough
Let’s start the process from scratch.
Stage 1. Learning Starts with the Basics of Design
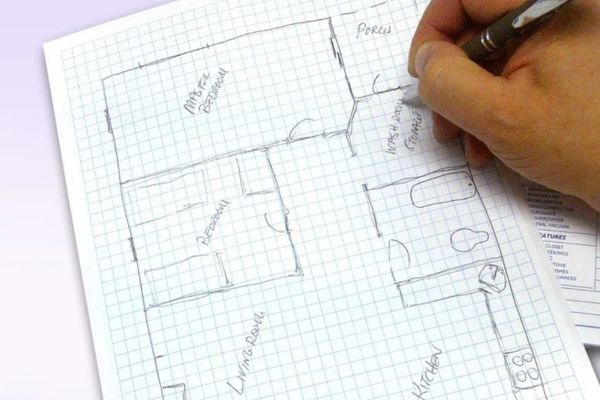
Figure 1: Basic drawing on paper
Image source: How To Draw Plans For Building Permits
Every architect’s journey starts with the simple draft, where students learn how to put their ideas on paper. Our experts will guide you using basic drawing tools and understanding shapes and lines to explain your ideas, making rough layouts and simple sketches. Students will learn the concepts of space management, balance and proportion. It helps you not only create a beautiful building but also helps create a strong base to move forward to advance tools and designs.
Stage 2. Drafting and Plan Rendering
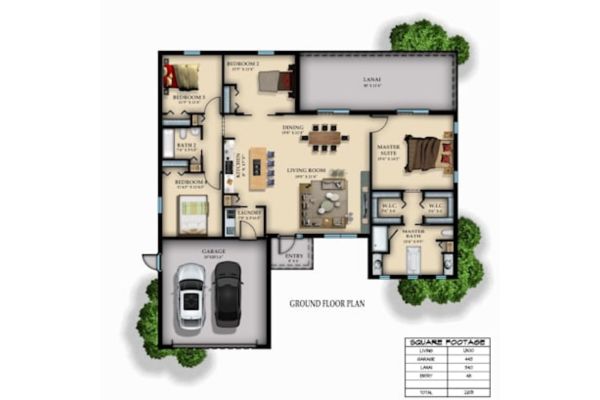
Figure 2: 2D Floor Plan made in AutoCAD and edited in Photoshop
Image Source: Fiverr
After completing the sketch and drawing with paper and pencil, you will get to know drafting software tools. N owadays, architecture designers use CAD software to create blue-prints or drawings of houses. The main applications at this stage are AutoCAD and Photoshop.
Autodesk AutoCAD
Figure 3: ADMEC AutoCAD Student Work
Image source: ADMEC’s AutoCAD Plans
AutoCAD is the design software that helps you make plans and models digitally. It is mainly used for giving more detailed and accurate drawings in 2D. It works quickly and turns your ideas into real designs. It is commonly used by designers, architects, and engineers for making drawings related to civil engineering, electrical, mechanical and architecture. To master this tool, you need to go with AutoCAD Courses for Civil Engineers in Delhi or in the specific specialization like mechanical and electrical.
Adobe Photoshop

Figure 4: ADMEC Student’s Photoshop Plan Rendering Work
Image Source: Plan Rendering Projects by ADMEC Students
Photoshop helps in editing photos, removing unused things, converting day scenes into night or vice-versa. In architectural designing, we use Photoshop for plan rendering in which we show 2D draft with relevant textures and objects. You can say, we beautify our black and white plans using Photoshop.
Stage 3. Moving towards 3d modeling
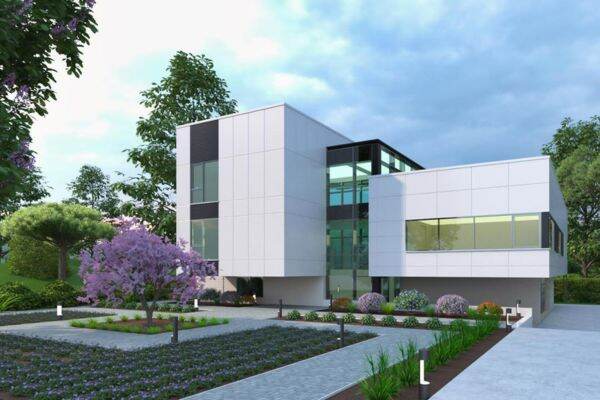
Figure 5: Realistic Building Exterior View Render
Image Source: Architectural Visualization Project by ADMEC Students
When you are done with learning 2D drawings and space planning then you will move to 3D modeling. This is what make your designs look alive and real. It helps you to show how the design will look once it is fully built. To do this job, you will learn various applications such as Autodesk Revit, 3Ds Max, and SketchUp.
Autodesk Revit
This software helps you to add 3D models, doors, windows and floors with accurate estimation. You can also make block diagrams, sections, costing, and views from it.
Revit is very useful for getting real-world information like materials, dimensions, and structural components. This software is mainly used by architects, designers, and engineers. But the question is where to learn this software? At this point, our Advanced Revit Course Delhi comes in demand.
Autodesk 3Ds Max
3Ds Max is commonly used for creating hyper-realistic images and characters. Mostly 3D designers, architects and engineers use it to make their projects. It is easy to use for you as well once you attend classes under our 3ds Max Course in Delhi. You will be able to turn your concept into 3D models easily.
SketchUp
Another good tool is SketchUp for you. It is helpful for beginners to create buildings, room layouts and interiors and also add colors in models and show how things will look in real life. It is very easy to use and quickly turn your ideas and designs into 3D designs. Make sure to advanced your skills with right SketchUp course.
Stage 4. Now Learn Rendering

Figure 6: Final Rendering of 3Ds Max Project using V-Ray
Image source: Interior Modeling Projects by ADMEC Architecture Students
After learning 3D modeling, the next step is rendering. In rendering process, we turn our 3D models look real with the help of light, color and texture settings. For that, we need software like Lumion and V-ray. These tools help us in presenting our 3D work in the form of hyper-realism.
Lumion
Lumion is a 3D rendering software that is used to render the detailed textures and lighting of the models. You can also add additional natural concepts like waterfalls, sunlight, shadows, trees, and moving things to your still models. Lumion has advance settings for making impressive projects. You can check dedicated Lumion course at ADMEC for better understanding.
V-ray
V-Ray is another application you can learn for rendering your projects. It helps in adding natural lighting, shadows, textures and reflections to the scene. V-ray has settings to adjust material, texture, paint, light, etc. to make model look polished. Check V-Ray master course to know what modules are there to cover.
Once rendering is done, you become ready to showcase your portfolio to the clients and interviewers.
Stage 5. Understanding of 3D Walkthroughs
This is the final step and also an exciting part when students learn how to make 3D walkthroughs. It feels like taking a virtual tour inside your design before it exists. You can walk into each room and see the walls, doors, furniture, and lighting.
A walkthrough is a very useful skill for presenting your projects. It builds trust and excitement because the client can clearly see what you are planning. It is also helpful to solve the problem before the construction.
Check the walkthrough animation video below.
Stage 6. Become Industry-ready
This is the last stage of the professional courses at our CAD Training Institute. Under this course, students will create final projects of architecture and interior designs. This part covers professional resume and portfolio development. Interview preparations through mock interviews come under this stage.
After completing the course, students will not only know how to design but they will also get to know how to present them professionally. You will be confident in drafting, modeling and rendering and able to explain and present your projects clearly.
Why choose CAD Training Institute (CTI)?
We focus on practical learning, not only on theory-based learning. Our CAD Training Institute gives real projects and assignments to students with step-by-step guidance from our expert faculty. In this way, we prepare our students for the industry.
If you want to be an architect or interior designer, our CAD Courses in Delhi are the best option for you. You will learn how to design, use of latest software and present them clearly and professionally. Classes at CAD Training Institute make you learn top tools.
There are many short term CAD courses which make learn about real industry insights. For more information, feel free to contact us anytime.